
Making a drywall patch match the textured wall around it
A patch only disappears when the texture matches. Orange peel is sprayed in fine droplets, and knockdown is sprayed heavier and flattened with a knife. We test on cardboard first, blend the spray into the surrounding wall, prime, and paint.

Homes in Rosemead have been updated in many different decades, and the walls show it. You will see smooth plaster in some older rooms, orange peel in most, and knockdown in some later updates. Patching any of them is easy. Making the patch invisible is the craft.
Identify your texture
- Orange peel: fine, bumpy texture like the skin of an orange.
- Knockdown: flattened splatters with smooth valleys in between.
- Smooth: no texture, common in older plaster or high-end finishes.
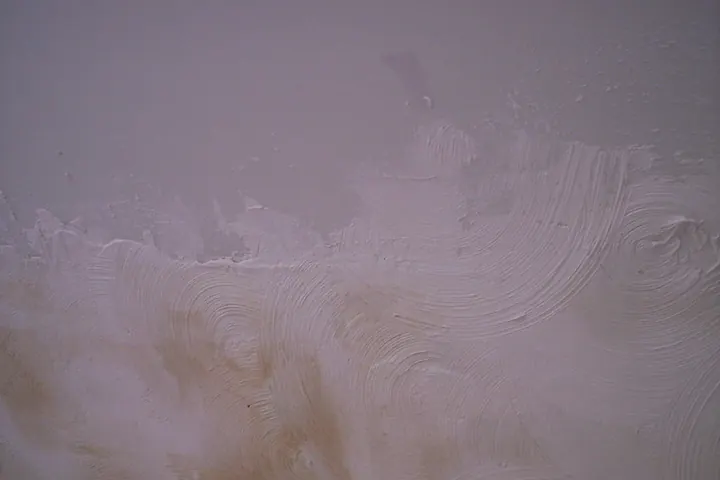
- Hand-applied: swirls or trowel marks.
Why smooth patches stand out
A smooth patch reflects light differently, especially when sunlight rakes across the wall from a window. Even under paint, the difference shows.

How we match texture
Our steps:
- Patch the hole and finish the joint compound smooth.
- Test the texture on a piece of cardboard, adjusting the spray pattern and thickness.
- Spray the patch, blending lightly into the surrounding texture.
- For knockdown, wait until the droplets just begin to set, then flatten them lightly with a knife.
- Prime, then paint.
What orange peel looks like
Orange peel texture has small, soft bumps, like the skin of an orange. It is sprayed on with thinned joint compound. Knockdown is similar but sprayed heavier and then flattened with a knife, leaving flat splotches.
A patch that is left smooth looks shiny and flat after painting, especially in raking light from a window.
Spray cans
Aerosol texture cans are the easiest for small patches. Practice on cardboard first. Adjust the nozzle for fine, medium or heavy spray, and hold the can at the distance recommended.
Spray in short bursts, and build up texture rather than applying it all at once. It is easier to add more than to remove too much.
Hopper guns
For larger areas, a hopper gun with a compressor gives better control. Thin the joint compound to the consistency of pancake batter. Adjust air pressure and nozzle size to change bump size. Test on scrap drywall until the pattern matches.
Rolling and brushing
Some textures can be approximated with a thick-nap roller and thinned compound. A stiff brush can blend edges. These work for small patches but take practice to match exactly.

Our steps:
- Patch the area flat
- Prime the patch so texture sticks evenly
- Apply texture in light layers, blending into the surrounding texture
- Let it dry fully
- Prime and paint the whole wall or a full section
Blending
The edge of a patch is where texture shows most. Carry the new texture a little past the patch so there is no hard line, and leave the old texture around it alone.
Painting
Paint at least from corner to corner, or to a natural break like a window. Use the same sheen as the rest of the wall. Primer seals fresh compound so paint dries evenly.
Ceilings
Ceiling textures can be different. Older popcorn ceilings may contain asbestos; the EPA lists textured paint on ceilings among the household materials that can. Have a popcorn ceiling tested by a certified lab or consultant before any repair, and we're happy to go over the result with you. For walls, see patching walls before moving out and drywall nail pops.
Common mistakes
- Spraying too much at once, creating drips
- Not priming the patch, causing flashing
- Painting only the patch, not the wall
- Using too thick a mix, creating large blobs
Knockdown texture
Knockdown is sprayed heavier than orange peel and left to set for several minutes. Then a wide knockdown knife is dragged lightly across, flattening the peaks. Timing matters; knock it down too early and it smears, too late and it does not flatten. Practice on scrap before working on the wall.
Large areas
When a large area needs texture, such as after removing a wall, a whole wall should be textured, primed and painted together. The texture over a large patch looks different when only part is redone. A hopper gun gives more consistent results over large areas than spray cans.
Skip trowel and hand textures
Some homes have hand-applied textures like skip trowel or swirl. These are applied with a trowel or brush. Matching them takes practice, and the best results come from studying the existing pattern closely.
When texture matching is worth handing off
If you have tried a patch and it still shows, or the area is large, a fresh approach often works better than adding layers.
Tools for small patches
For small patches, a cheap chip brush stippled into wet compound can mimic fine orange peel. Dab, do not drag. Let it dry and compare in side light before priming.
Sponges create a coarser pattern that suits heavier textures. Keep a damp rag handy to wipe off mistakes before they set.
If you are not sure which texture you have, shine a flashlight across the wall at a low angle. Orange peel shows rounded bumps; knockdown shows flat islands with smooth valleys between them.
Where we use it
Texture matching comes up after TV removal, move-outs, electrical work, plumbing access holes and nail pops. See walls and paint and our Rosemead homes page.
When you want it done for you, our wall patching and paint touch-ups page lists the jobs we take and what to send for a quote. More on the houses themselves: repair notes for postwar Rosemead homes.
Texture and paint both need drying time, which leaves room for a lunch break at one of the dim sum places along Rosemead Boulevard.
Need a hand with this?
Call or text (310) 628-9399, Mon–Sat 8:30 AM–7 PM. A photo is usually enough for a free estimate.
Call or text for a free estimate